Turnkey Plugins \ Social Login for Zen-Cart Fork on Github
Social Login for Zen-Cart
Social Login allows your users to connect with one click to your Zen-Cart shop by using their social network accounts. Gather rich demographic information (age, gender, phone numbers ...) about your users without requiring them to fill out any forms. Obtain pre-validated email addresses and increase your data quality.
Social Login seamlessly integrates into your ZenCart shop so that you and your users don't have to start from scratch.
Increase your registration rate
Social Login increases the user registration rate of your shop by simplifying the registration process. Get rid of long forms and complicated captchas by allowing new users to sign-up with their existing social network accounts.
Your existing users can furthermore link their regular account to one or more social networks and can then use these social network accounts to login. Eliminate the issues of forgotten usernames and passwords!
35+ Social Networks Supported: Facebook, TikTok, Google, Twitter, Instagram, LinkedIn, Yahoo, PayPal, Foursquare, OpenID, LiveJournal, Steam, Wordpress.com, StackExchange, Windows Live, Pinterest, Instagram, Disqus, Blogger, Github.com, Skyrock.com, VKontakte, Mail.ru ... View Datasheet
1. Install Social Login for Zen-Cart
The installation is not very complicated and should only take a couple of minutes. Please follow the instructions carefully and do not skip any steps.
a. Download the plugin
Social Login for Zen-Cart 1.5.x
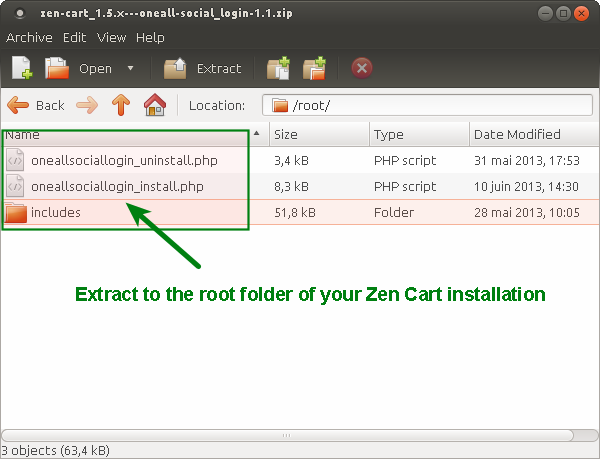
b. Extract the /root/ folder
Extract all files and folders included in the /root/ directory of the downloaded .ZIP file to the root directory of your Zen-Cart installation. Existing files have to be overwritten. The following files need to be extracted:
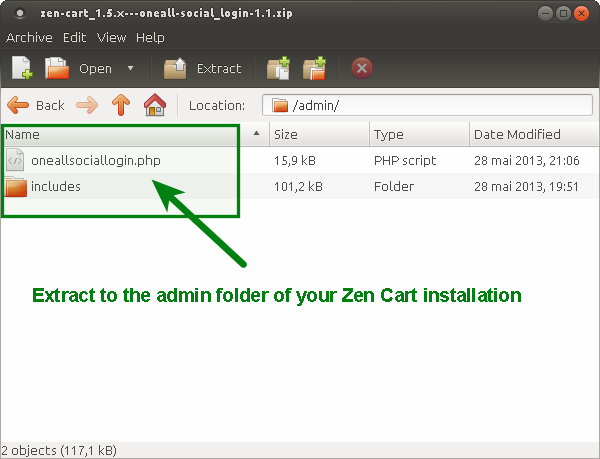
c. Extract the /admin/ folder
Extract all files and folders included in the /admin/ directory of the archive to the /admin/ directory of your Zen-Cart installation. Existing files have to be overwritten.
If you have renamed your Zen-Cart /admin/ folder then extract the files to the renamed folder instead. The admin folder can be deduced from the URL that you use to login to your Zen-Cart administration area:
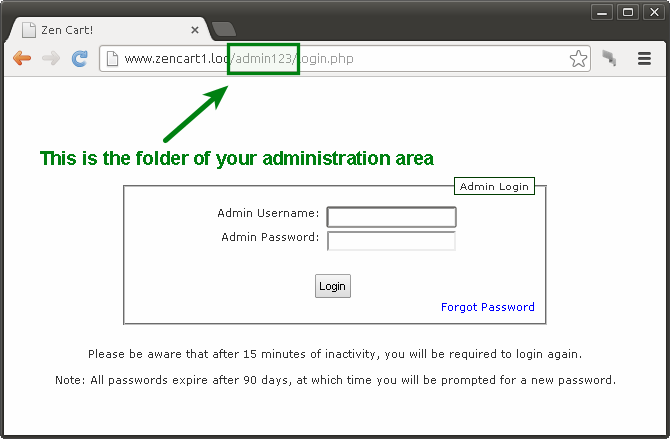
The following files need to be extracted:
d. Launch the installation script
For security reasons you should remove the installation file after having successfully installed the plugin.
To install Social Login you need to open the file oneallsociallogin_install.php in your browser.
If the homepage of your shop is for example http://www.my-shop.com/, then the file that you have to open would be called http://www.my-shop.com/oneallsociallogin_install.php
You should see a page like this when opening that file in your browser:
		OneAll Social Login: Installation

		Status:

		    Default template directory [includes/templates/template_default/]
		    Current template directory [includes/templates/responsive_classic/]
		    Copying template file to [includes/templates/responsive_classic/jscript/jscript_oneallsociallogin.php]
		    Copying template file to [includes/templates/responsive_classic/sideboxes/oneallsociallogin.php]
		    Copying template file to [includes/templates/responsive_classic/templates/tpl_oneallsociallogin_default.php]
		    Database entry [layout_boxes:197] removed
		    [ ... ]
		    Done! Please remove this file now.
If this file does not exist, then please return to step 1b and make sure that you have correctly added the plugin files.
e. Setup Social Login
After having installed the Social Login you have to enter your OneAll API credentials and you must setup the social networks that you would like to use. Please follow the setup guide below.
2. Setup Social Login for Zen-Cart
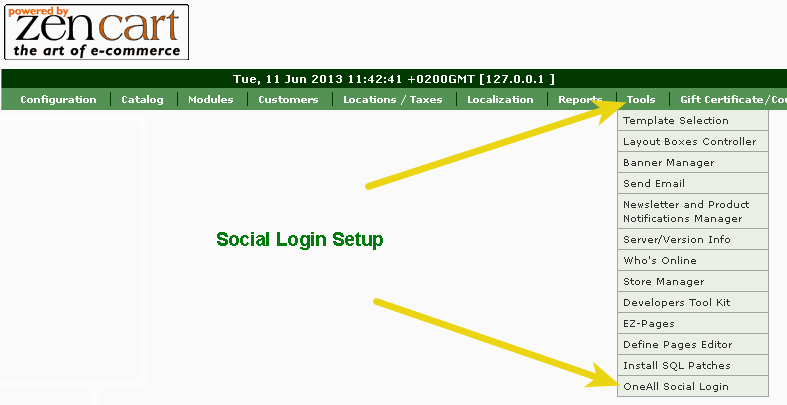
a. Open the Social Login setup page
To enable Social Login you have to enter your OneAll API credentials and you must setup the social networks that you would like to use. Open your Zen-Cart admin area and navigate to Tools \ OneAll Social Login.
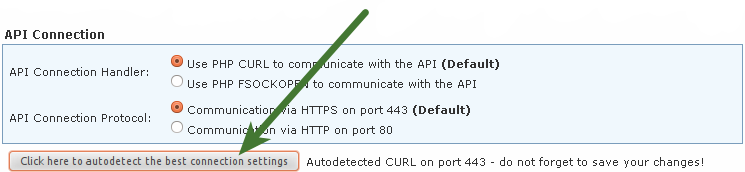
b. Setup the API Connection Handler
Click on the button Click here to autodetect the best connection settings.
You should receive a success message if your server is able to communicate with our API.
Your firewall must allow outbound requests on either port 80 or 443.
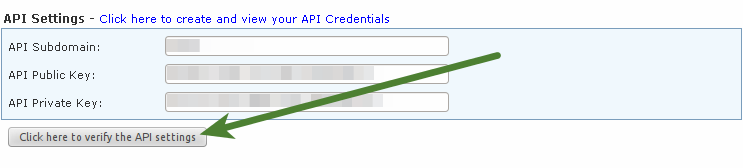
c. Enter your API Settings
To obtain your API Credentials you need a OneAll Site. If you do not have a site yet, you should create a new site for free now. Fill out the API Settings and click on the Click here to verify the API Settings button. You should receive a success message if your credentials are correct.
d. Enable the Social Networks that you would like to use.
Tick the social networks that you would like to use and save your settings.
Please note that many social networks require that the webmasters register their website before being able to use more advanced features. To be able to use the plugin, you must therefore register your site. This process is straightforward and takes only a couple of minutes.
It has to be done only once for each provider and we will guide you through this process. To setup your providers, please login to your OneAll account, select your Site and then click on Social Networks.
3. Help & Troubleshooting
a. The API communication does not seem to work correctly
Please make sure that your firewall does not block outbound requests on both ports 80 and 443.
One of these ports must allow outgoing requests (from your server to ours) so that the plugin can establish a communication with our API.
If you have access to the console of your server you can test if outbound requests are allowed by using this command:
telnet ping.api.oneall.com 443. If the port is open then you should obtain a result like this:
		~$ telnet ping.api.oneall.com 443
		Trying 136.243.63.184...
		Connected to ping.api.oneall.com.
		Escape character is '^]'
b. Social Login is not displayed
Per default Social Login will be added to the sidebar of your shop. If your shop does not have a sidebar, you can manually add the social login icons by copy/pasting the following code:
		<?php
			// OneAll Social Login
			require ($template->get_template_dir ('tpl_oneallsociallogin_widget.php', DIR_WS_TEMPLATE, $current_page_base, 'templates') . '/tpl_oneallsociallogin_widget.php');
		?>
Just edit any .php file (e.g. tpl_login_default.php) in your templates directory and paste the code at the location where you want to display the icons.
4. Fork on Github
Feel free to fork our Zen-Cart GitHub repository to contribute to the development of this mod.