Turnkey Plugins \ Social Login for PrestaShop Fork on Github
1. Installation
The installation is not very complicated and should only take a couple of minutes. Please follow the instructions carefully and do not skip any steps.
a. Download the module that corresponds to your PrestaShop version
b. Add the module to your PrestaShop
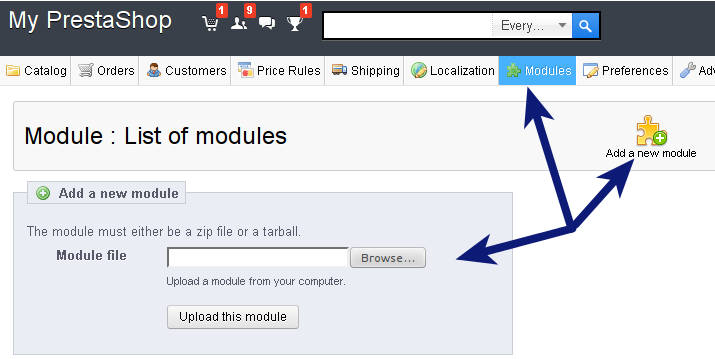
First login to your PrestaShop administration area and navigate to the Modules page. Then click on the link Add a new module and upload the .ZIP file that you have downloaded in the previous step.
c. Install the uploaded module
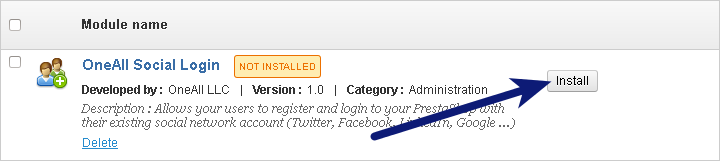
First navigate to the Modules page in your PrestaShop administration area. Then search for the module OneAll Social Login and click on the Install button.
2. Configuration
a. Open the configuration panel
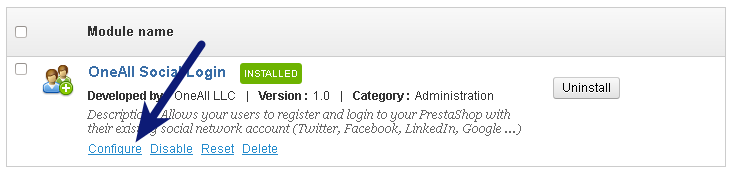
Login to your PrestaShop administration area, navigate to the Modules pages. Search for OneAll Social Login and click on the Configure link or button.
b. Setup the API Connection Handler
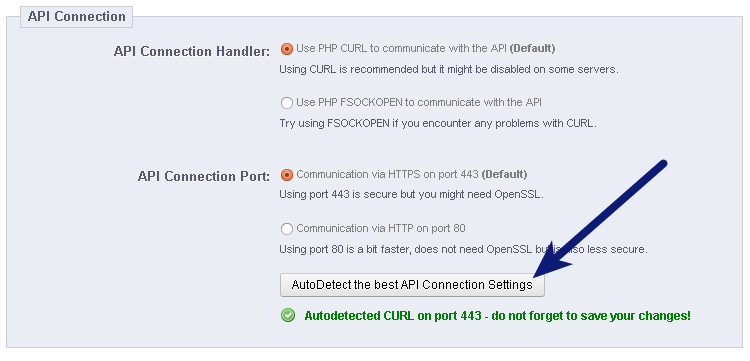
Click on the Autodetect the best API Connection Settings button.
You should receive a green success message if your server is able to communicate with our API.
Your firewall must allow outbound requests on either port 80 or 443.
c. Enter your API Settings
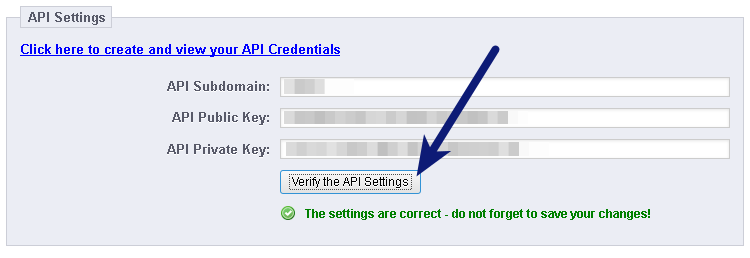
To obtain your API credentials, please login to your OneAll account and open the page Site Settings \ API Settings & Credentials of a Site. If you do not have a Site yet, please create a new Site now.
Fill out the API Settings and click on the Verify the API Settings button. You should receive a green success message if your credentials are correct.
d. Choose the Social Networks that you would like to enable
Please note that many social networks require that the webmasters register their website before being able to use their services. To be able to use the plugin, you must therefore register your website. This process is straightforward and takes only a couple of minutes.
It has to be done only once for each provider and we will guide you through this process. To setup your providers, please login to your OneAll account, select a Site and click on Social Networks.
3. Additional Information
The module supports translation through the Administration backend.
4. Help & Troubleshooting
a. The Social Login icons are not being displayed
Per default Social Login will be displayed in the sidebar of your PrestaShop. If your shop does not have a sidebar, then the plugin might not be displayed correctly. In this case you can add Social Login manually by copy/pasting the following code into your template (*.tpl files):
{$HOOK_OASL_CUSTOM nofilter}
b. Class 'OneAllSocialLoginController' not found
If you get an error like PHP Fatal error: Class 'OneAllSocialLoginController' not found then you might have
to refresh the PrestaShop class cache. Simply delete the file /cache/class_index.php from your PrestaShop folder.
PrestaShop will automatically create a new, updated version of that file.
c. I get a blank page after connecting with a social network
Please start by refreshing the PrestaShop class cache. Simply delete the file /cache/class_index.php from your PrestaShop folder.
PrestaShop will automatically create a new, updated version of that file.
If this does not fix the error, then please verify your API settings in the Social Login setup in your PrestaShop administration menu and check Prestashop logs, in the "Advanced parameters" > "Logs" menu.
d. The plugin does not work with usernames that have cyrillic symbols
Social Login might throw an error if a user tries to login with a social network profile that has cyrillic characters. This is not a limitation of the plugin, but a limitation of Prestashop itself. Per default Prestashop in fact does not allow usernames with special characters.
To remove this limitation you first need to open the file classes/Customer.php in your Prestashop directory. Then look for the
following code:
        'lastname' => array('type' => self::TYPE_STRING, 'validate' => 'isName', 'required' => true, 'size' => 255),
        'firstname' => array('type' => self::TYPE_STRING, 'validate' => 'isName', 'required' => true, 'size' => 255),
And replace isName by isAnything, like this:
        'lastname' => array('type' => self::TYPE_STRING, 'validate' => 'isAnything', 'required' => true, 'size' => 255),
        'firstname' => array('type' => self::TYPE_STRING, 'validate' => 'isAnything', 'required' => true, 'size' => 255),
e. The API Communication does not seem to work correctly
Please make sure that your firewall does not block outbound requests on both ports 80 and 443.
One of these ports must allow outgoing requests (from your server to ours) so that the plugin can establish a communication with our API.
If you have access to the console of your server you can test if outbound requests are allowed by using this command:
telnet ping.api.oneall.com 443. If the port is open then you should obtain a result like this:
		~$ telnet ping.api.oneall.com 443
		Trying 136.243.63.184...
		Connected to ping.api.oneall.com.
		Escape character is '^]'.
f. Social Login is not displayed on the login/registration page
Per default the social login icons are displayed below the h1 element when it has either the class page-heading or heading.
If your theme does not use these classes then the icons will not be added.
In this case you can manually add Social Login by adding the code {$HOOK_OASL_CUSTOM nofilter} to
the template file.
g. I'm redirected but not logged using Social Login
Please make sure that you have the DisplayTop hook shown in the OneAll Social Login plugin settings.
- Log into your Prestashop administration backend,
- Go to Modules \ Module Manager,
- Search for OneAll Social Login and click on Configure button
- Click on button Manage Hook located to the page right top
- Check that you have a hook called displayTop, and if you don't, create it by clicking on Transplant Hook located to the page right top
- Select as module OneAll Social Login and DisplayTop as value for Transplant to field
- Click on Save button
5. Fork on Github
Feel free to fork our Prestashop GitHub repository to contribute to the development of this module.