Turnkey Plugins \ Social Login for Joomla! Fork on Github
1. Installation
The installation takes only a few minutes. Please follow our instructions carefully and do not skip any steps.
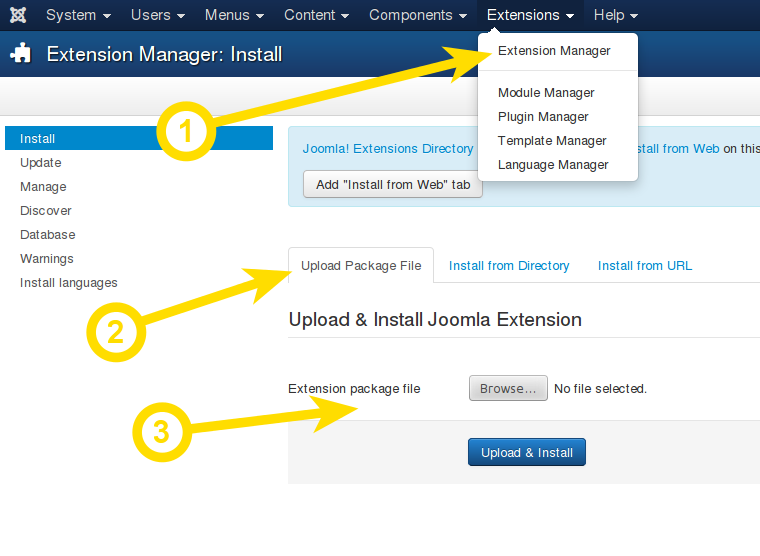
a. Download the module
b. Upload the downloaded file
Login to your Joomla! administration area and navigate to Extensions \ Extension Manager. Then navigate to the Upload Package File panel, click on Browse, select the previously downloaded file and click on Upload File & Install
2. Configuration
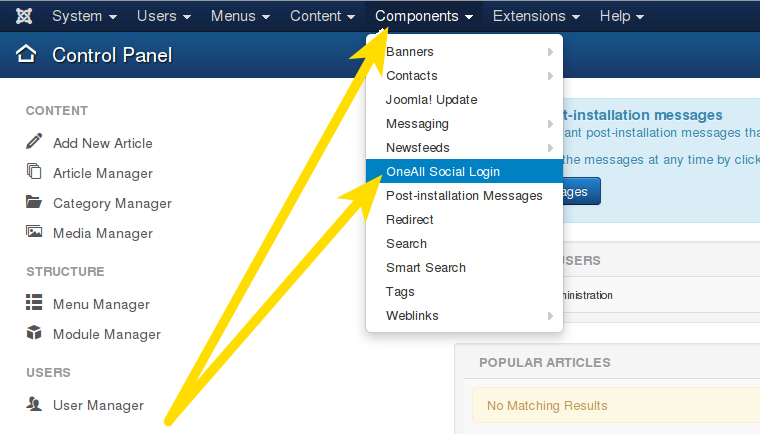
a. Open the configuration panel
Login to your Joomla! administration area and navigate to Components \ OneAll Social Login.
b. Setup the API connection handler
Click on the link Click here to autodetect the API Connection Handler.
You should receive a green success message if your server is able to communicate with our API.
Your firewall must allow outbound requests on either port 80 or 443.
c. Enter your API credentials
To obtain your API credentials, please login to your OneAll account and open the page Site Settings \ API Settings & Credentials of a Site.
Fill out the API credentials in the Joomla! administration area and click on the link Click here to verify the API Connection Settings. You should receive a green success message if your credentials are correct.
d. Setup the social networks
Select the social networks that you would like to use by ticking their checkboxes.
Please note that many social networks require that the webmasters register their website before being able to use their services. To be able to use the plugin, you must therefore register your website. This process is straightforward and takes only a couple of minutes.
It has to be done only once for each provider and we will guide you through this process. To setup your providers, please login to your OneAll account, select a Site and click on Social Networks.
3. Help & Troubleshooting
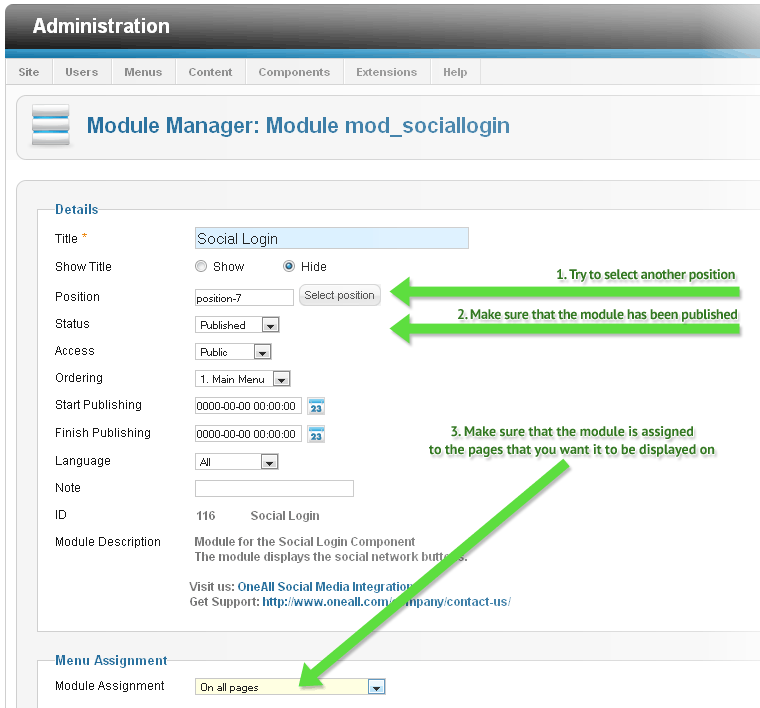
a. Social Login is not displayed at all on my Joomla! website!
Please login to your Joomla! administration menu, click on Extensions and select Module Manager. Search for the module OneAll Social Login and click on it's title. Verify the module settings according to the screenshot below.
4. Fork on Github
Feel free to fork our Joomla GitHub repository to contribute to the development of this mod.